
Shaker card - Beary Christmas
Hi guys, Julie here with you today and I am sharing my very first flat shaker card. I don't make a lot of shaker cards, but I like the idea of this one because it's easier and I can recycle all of the plastic I keep from packaging.

For this card, I started with Bristol smooth cardstock, cut with a nesting die smaller than a A2 card. I used chipped sapphire, lucky clover and shabby shutters. After I finished my ink blending, I used the snowflake flurries stencil with Yeti pigment ink from lawn fawn. Then, I added sparkle on the snowflakes with a shimmer spray. Obviously, after that, I had to add some white splatter with my picket fence spray stain.
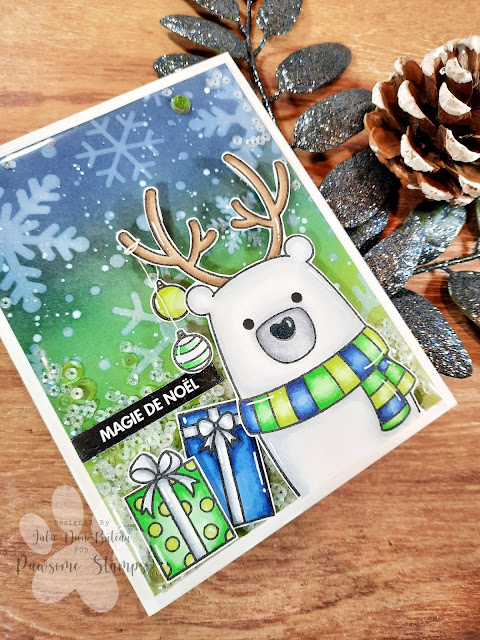
After that, I assembled my flat shaker card, so I found a plastic of a stamp packaging that was the right size, and then I added strips of tape on the back. I glued 3 parts except the top part, so I could add sequins. For the sequins, I used a mixed of small ones that I had and the captivating cactus mix. I glued the top part and my shaker was done. The fastest shaker I have ever made!
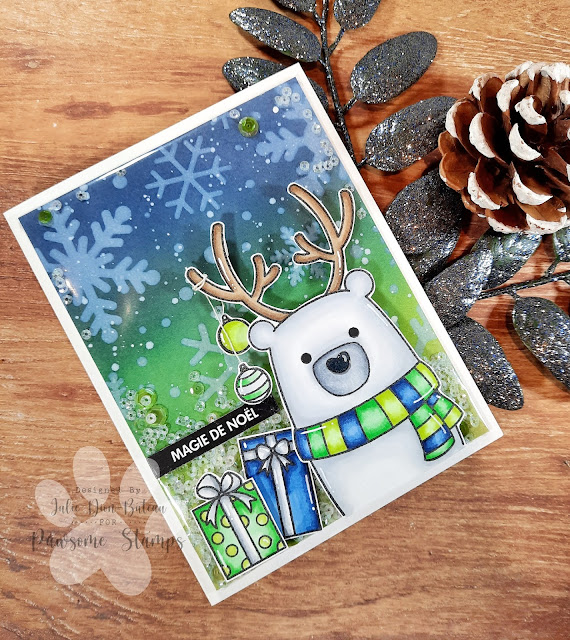
To finish my card, I add foam tape on the bear and on one of the gifts. I added a small string on the
ornaments because I wanted to make it look like they were hanging from the antlers. I added foam tape on one of them to add some depth to them. The finishing touches were the sentiment strip, some white lines with my gelly roll pen and glossy accents on the nose of the bear.
I really like how this card turned out and I love the colors combo. I really love making Christmas cards and I had so much fun making this one.
I hope you like my project today, thank you for stopping by and have an awesome day!


Comments
Post a Comment