
Playful Pandas Part Two
Hey everyone, Britney here! I am so excited to be on the Pawsome Stamps blog today featuring a set from the new release, Playful Pandas. This is such a cute set with so many uses!
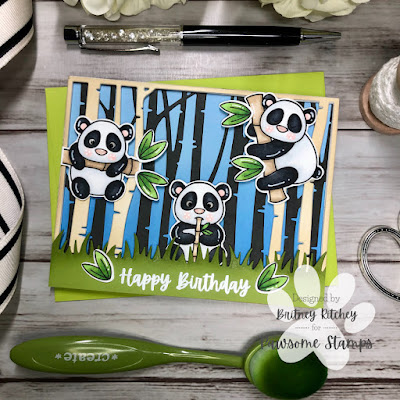
I always like to start with my background first and I build up from there. I cut a piece of light blue cardstock using my paper trimmer the size of an A2 card. I did a little ink blending on the bottom of the panel to give it some nice contrast. Using a tree background dies from my stash, I cut the two contrasting layers. One out of dark gray cardstock and four out of white cardstock. I did some light ink blending on the top layer before gluing them together. Using a green scrap piece of cardstock, I used a grass die and did some ink blending. I sat this to the side to completely dry as I knew I wanted to emboss my sentiment on it. Note: this needs to be completely dry, otherwise, embossing powder will stick everywhere.
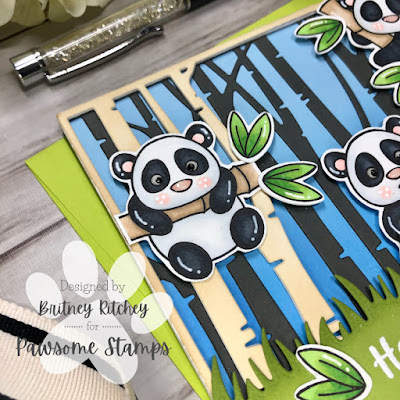
Now that I have all my background elements ready, it’s time to stamp the images. I used the Misti Stamping Tool and a Copic-friendly ink to stamp images onto a piece of Neenah Classic Crest Solar White Cardstock. Use your favorite color medium to color in the images. I prefer Copics usually. You can fussy cut the images or use the coordinating dies. I finished off my images using a black glaze pen for the eyes and a white gel pen to add some accents. I laid out my images to get perfect placement and glued them directly onto the circle background.
I used a strong liquid adhesive to glue my panels to the card base. I also like to place it under two of my Mistis to help it lie nice and flat. I popped my images and grass section with foam tape. As my very last step, I used some glossy accents on the eyes and nose. I do this as my very last set or I will have gloss accents smeared everywhere.
I hope you enjoyed this card as much as I enjoyed making it. Have a wonderful day and make sure to check out all the goodies in the Pawsome Stamps shop.


Comments
Post a Comment